
Wrist pain is quite common and there are lots of different causes for it, each can result in different aches or pains and triggers. This Supporting the Wrists in Yoga mini guide will give you lots of information to help you modify and support the wrists during your yoga practice. That said, wrist pain is very indiviual, it’s important to listen to your body and only do what feels good for you.
This mini guide doesn’t replace any medical guidance, however it does provide some information to help support you during your yoga practice.
Common Causes of Wrist Pain
Some common causes of wrist pain include arthritis, carpel tunnel syndrome, ganglion cysts, gout, strains, sprains and fusion in the wrists.
Pain can also be caused by incorrect alignment and overuse. During yoga we usually want joints stacked over joints when bearing load. For wrists this usually means having a straight line between the wrists and the shoulders – but not locking out (hyperextending) the elbows.
If you’re not use to placing weight on the wrists, then taken your time to slowly build up. Take regular rests when you need it and never stay in the pose to the point of feeling pain. This can end up causing wrist strains and soft tissue damage.
Loosen the Wrists
This short sequence will help you to loosen the wrists, reduce tension and increase movement of synovial fluid to the joints. This can help with wrist mobility.
Please remember to work in your range of motion. If you feel any pain, then please stop or modify that pose or movement.
Yoga without the Wrists
There are some yoga classes specifically designed without poses that place weight or pressure on the wrists.
Here are two yoga classes that specifically don’t place any weight on the wrists:
Wrist Modifications
There are a few modifications and supports you can use to help support the wrists in your yoga practice.
- Folding the front of the mat for extra padding or using a blanket to support the hands in poses such as Downwards Facing Dog or Plank pose (any pose where we put weight on the hands/ wrists). This can help in one of two ways:
- To reduce the extension of the wrist, place the heel of the hand on the folded mat/ blanket with the fingers on the floor.
- To reduce the flexion in the wrist, place the heel of the hand on the floor, with the fingers on the folded mat/ blanket.
- Use a specific yoga wedge that like the folded mat/ blanket, helps to either reduce the flexion or extension in the wrists. Changing the angle of the wrist can relieve pain in poses such as plank where we place weight on the wrists.
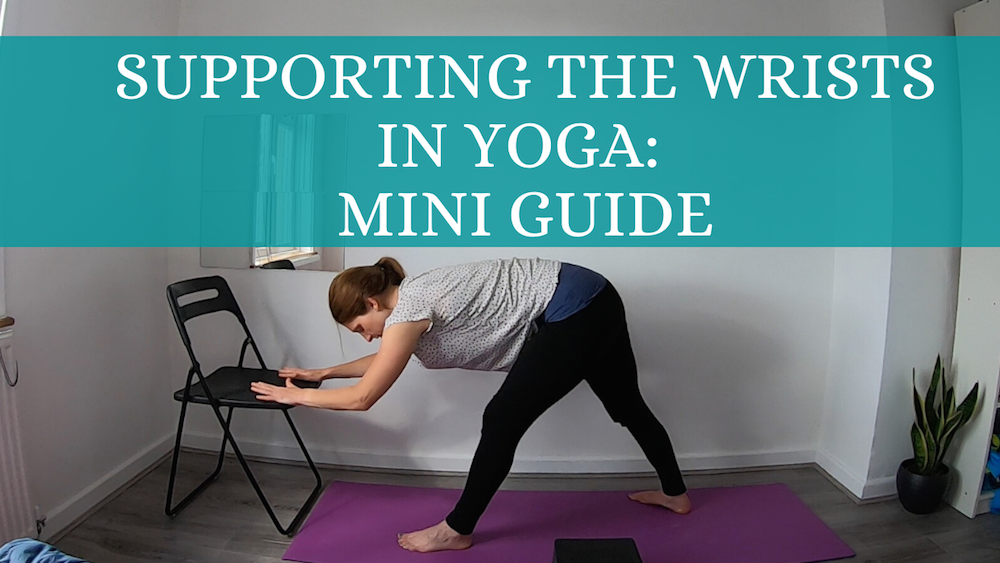
- Use a chair to support the hands in poses such as Downwards Facing Dog. This reduces the amount of weight on the hands/ wrists.
- Use a wall to support the hands in poses that place weight on the hands. This reduces the weight on the wrists, like using a chair.
- Come onto your forearms, rather than your hands. You can use yoga blocks or books to raise the forearms up to keep alignment of the spine, in poses such as All Fours position and Cat/ Cow.
- Use dumbbells to support the hands in poses like Plank. Changing the position of the hands and where the weight is distributed can ease pain for some people.
Supporting the wrists in yoga with this Wrist Friendly Yoga sequence
During this short sequence we’ll use a chair to help support the wrists. I also offer the option to use yoga blocks or bricks instead.
This class is to give you some inspiration to different ways you can use these props and help you in supporting the wrists in yoga.
I hope you found this Supporting the Wrists Mini Guide helpful.
I’ll try and add to this guide overtime, however if you’ve come across any specific modifications or alternatives poses that work for you, please share them in the comment section below.